
- android 开发教程之日历项目实践(二)
- Android checkbox的listView具体操作方法
- Android编程之自定义AlertDialog(退出提示框)用法实例
- android PopupWindow 和 Activity弹出窗口实现方式
- Android使用缓存机制实现文件下载及异步请求图片加三级缓存
- Android 解决使用SearchView时软键盘不支持actionSearch的问题
- android IPC之binder通信机制
- [Android开发视频教学]01_20_XML文件解析
- Android自定义View实现左右滑动选择出生年份
- Android自定义照相机倒计时拍照
- Android开发入门之Appwidget用法分析
- Andriod 读取网络图片实例代码解析
- 如何判断软件程序是否联网 联网状态提示信息Android实现
- 详解Android文件存储
- Android实现蒙板效果
- Android绘制炫酷引导界面
- android异步加载图片并缓存到本地实现方法
- camera录制视频的缩略图获取原理心得分享
- Android编程读取sd卡中图片的方法
- Android NDK开发之:配置环境的详解
- Android中使用Service实现后台发送邮件功能实例
- Android编程实现图片的浏览、缩放、拖动和自动居中效果
- Android重写TextView实现文字整齐排版的方法(附demo源码下载)
- Android如何自定义视图属性
- Android编程实现修改标题栏位置使其居中的方法
- 操作SD卡中文件夹和文件的方法
- Android中传递图片的2种方法
- Android之PreferenceActivity应用详解(2)
- Android绘图常用方法汇总
- Android系统设置中的清除数据会清除哪些数据?
Android控件之ImageView用法实例分析
作者:佚名 Android开发编辑:admin 更新时间:2022-07-23
本文实例讲述了Android控件之ImageView用法。分享给大家供大家参考。具体如下:
ImageView控件是一个图片控件,负责显示图片。
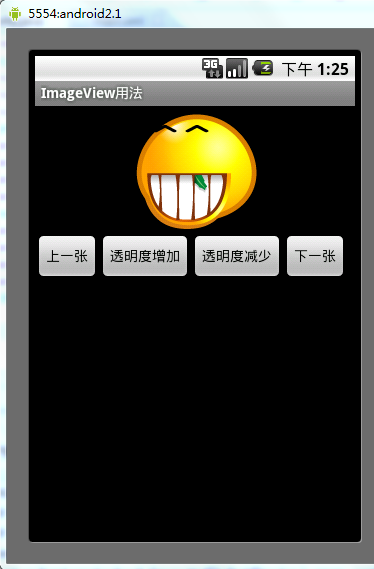
以下模拟手机图片查看器
目录结构:
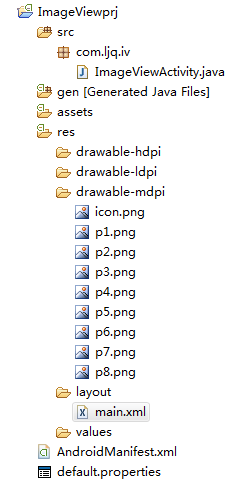
main.xml布局文件:
<?xml version="1.0" encoding="utf-8"?>
<LinearLayout xmlns:android="http://schemas.android.com/apk/res/android"
 android:orientation="vertical"
 android:layout_width="fill_parent"
 android:layout_height="fill_parent">
 <ImageView android:id="@+id/imageView"
  android:layout_width="wrap_content"
  android:layout_height="wrap_content"
  android:layout_gravity="center_horizontal"
  android:src="@drawable/p1"/>
 <LinearLayout xmlns:android="http://schemas.android.com/apk/res/android"
  android:orientation="horizontal"
  android:layout_width="fill_parent"
  android:layout_height="wrap_content"
  android:layout_gravity="center_horizontal">
  <Button android:id="@+id/previous"
   android:layout_width="wrap_content"
   android:layout_height="wrap_content"
   android:text="上一张"
   android:layout_gravity="center_horizontal"/>
  <Button android:id="@+id/alpha_plus"
   android:layout_width="wrap_content"
   android:layout_height="wrap_content"
   android:text="透明度增加"
   android:layout_gravity="center_horizontal"/>
  <Button android:id="@+id/alpha_minus"
   android:layout_width="wrap_content"
   android:layout_height="wrap_content"
   android:text="透明度减少"
   android:layout_gravity="center_horizontal"/>
  <Button android:id="@+id/next"
   android:layout_width="wrap_content"
   android:layout_height="wrap_content"
   android:text="下一张"
   android:layout_gravity="center_horizontal"/>
 </LinearLayout>
</LinearLayout>
ImageViewActivity类:
package com.ljq.iv;
import android.app.Activity;
import android.os.Bundle;
import android.view.View;
import android.widget.Button;
import android.widget.ImageView;
public class ImageViewActivity extends Activity {
 private ImageView imageView=null;
 private Button previous=null;//上一张
 private Button next=null;//下一张
 private Button alpha_plus=null;//透明度增加
 private Button alpha_minus=null;//透明度减少
 private int currentImgId=0;//记录当前ImageView显示的图片id
 private int alpha=255;//记录ImageView的透明度
 int [] imgId = {   //ImageView显示的图片数组
   R.drawable.p1,
   R.drawable.p2,
   R.drawable.p3,
   R.drawable.p4,
   R.drawable.p5,
   R.drawable.p6,
   R.drawable.p7,
   R.drawable.p8,
  };
 @Override
 public void onCreate(Bundle savedInstanceState) {
  super.onCreate(savedInstanceState);
  setContentView(R.layout.main);
  imageView=(ImageView)findViewById(R.id.imageView);
  previous=(Button)findViewById(R.id.previous);
  next=(Button)findViewById(R.id.next);
  alpha_plus=(Button)findViewById(R.id.alpha_plus);
  alpha_minus=(Button)findViewById(R.id.alpha_minus);
  previous.setOnClickListener(listener);
  next.setOnClickListener(listener);
  alpha_plus.setOnClickListener(listener);
  alpha_minus.setOnClickListener(listener);
 }
 private View.OnClickListener listener = new View.OnClickListener(){
  public void onClick(View v) {
   if(v==previous){
    currentImgId=(currentImgId-1+imgId.length)%imgId.length;
    imageView.setImageResource(imgId[currentImgId]);
   }
   if(v==next){
    currentImgId=(currentImgId+1)%imgId.length;
    imageView.setImageResource(imgId[currentImgId]);
   }
   if(v==alpha_plus){
    alpha+=10;
    if(alpha>255){
     alpha=255;
    }
    imageView.setAlpha(alpha);
   }
   if(v==alpha_minus){
    alpha-=10;
    if(alpha<0){
     alpha=0;
    }
    imageView.setAlpha(alpha);
   }
  }
 };
}
运行结果:
希望本文所述对大家的Android程序设计有所帮助。
- [Java4Android]10_循环语句
- Listview加载的性能优化是如何实现的
- 实例讲解Android中ContentProvider组件的使
- Android编程实现WebView全屏播放的方法(附源
- Android中通知栏跳动问题解决方法
- Android应用开发中WebView的常用方法笔记整
- 解析Android中的Serializable序列化