
- 使用百度网盘配置私有Git服务
- ios7.0结合storyborad实现页面跳转的总结
- 比特币钱包应用breadwallet源码V1.0
- 关于输入框被键盘覆盖及收回键盘的问题
- 系统音&警告音&震动
- IOS自动布局-UIStackPanel和UIGridPanel(一)
- Xcode5创建自己的静态库详解
- IOS开发基础知识--碎片11
- c/c++堆栈分布及其设置方法
- 公司项目适配IOS9总结
- iOS开发中使用UILabel设置字体的相关技巧小结
- storyboard
- Cheatsheet:201401.15~01.30
- ios开发常用宏
- 俩个月的IOS研究-记
- 【读书笔记】UIFont-动态下载系统提供的多种中文字体网址
- iOS学习笔记(4)@property和类型之间用括号添加一些额外的指示符的作用
- IOS学习日志2015-3-17
- iOS App开发中的UIStackView堆叠视图使用教程
- 一周随笔--15.10.06
- xCode里面设置NSZombieEnabled定位错误
- (高小德用车)高仿滴滴/快的应用源码
- Objective-C处理空字符串和页面传值及自定义拷贝
- Objective-C代码规范(CodeStyle)
- iOS开发中#import、#include和@class的区别解析
- UITableView性能-圆角图片
- 图片处理代码片段
- ios水果风暴游戏源码项目下载
- XCode6.0的iOS免证书真机测试方法(MAC及黑苹果均有效)
- 使用Xcode上传代码至GitHub
iOS开发中tableViewCell的悬浮效果
作者:佚名 IOS开发编辑:admin 更新时间:2022-07-23
其实很早就想写博客了,只是感觉自己的技术不行,写出来的东西技术性不强,写出来也没什么用,不过后来想想,写写博客记录开发中遇到的问题也不错....
今天我想写的是tableView的悬浮效果,因为我们公司最近在开发社区,就是和百度贴吧类似的,嵌套在应用中,而其中关于每一个的帖子要像这种效果
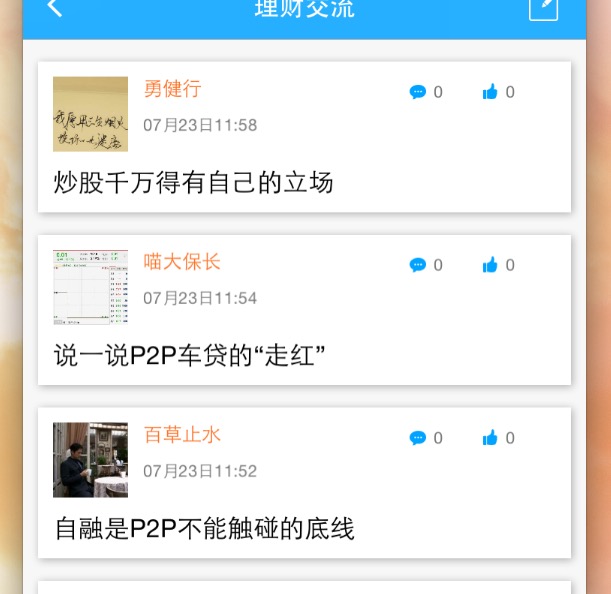
开始是做不出这种效果,就直接写个tableView算了,后来跟问了下做安卓的那边,原来是阴影的效果...
说到这里,相信好多同学都知道,好吧,我们开始上代码,首先是创建tableView,这个就不用多说了吧,这是创建tableView的.m文件
#import "ViewController.h"
#import "DemoCell.h"

//屏幕宽度
#define SCREEN_WIDTH ([[UIScreen mainScreen] bounds].size.width)
//屏幕高度
#define SCREEN_HEIGHT ([[UIScreen mainScreen] bounds].size.height)

@interface ViewController () <UITableViewDataSource,UITableViewDelegate>

@PRoperty (nonatomic,strong)UITableView *tableView;
@property (nonatomic,assign)CGFloat height;
@end

@implementation ViewController

- (void)viewDidLoad {
    [super viewDidLoad];
    [self createTabelView];
}
- (void)createTabelView{
    self.tableView = [[UITableView alloc] initWithFrame:CGRectMake(0, 20, SCREEN_WIDTH, SCREEN_HEIGHT-20) style:UITableViewStylePlain];
    self.tableView.delegate = self;
    self.tableView.dataSource = self;
    self.tableView.separatorStyle = UITableViewCellSeparatorStyleNone;
    [self.view addSubview:self.tableView];
}
- (NSInteger)tableView:(UITableView *)tableView numberOfRowsInSection:(NSInteger)section
{
    return 5;
}
- (UITableViewCell *)tableView:(UITableView *)tableView cellForRowAtIndexPath:(NSIndexPath *)indexPath
{
    //注意重用
    static NSString *cellId = @"cell";
    DemoCell *cell = [tableView dequeueReusableCellWithIdentifier:cellId];
    if(cell == nil){
        cell = [[DemoCell alloc] initWithStyle:UITableViewCellStyleDefault reuseIdentifier:cellId];
    }
    return cell;
}
- (void)didReceiveMemoryWarning {
    [super didReceiveMemoryWarning];
}
- (CGFloat)tableView:(UITableView *)tableView heightForRowAtIndexPath:(NSIndexPath *)indexPath
{
    return [DemoCell getHeight] + 10;
}
@end
然后是自定义cell,自定义cell要注意因为要写出悬浮效果,所以我想的是给Cell加一层View,这个View的frame比Cell的contentView小一圈,在设置边框的阴影,就能写出悬浮效果了,这是自定义Cell的.m文件
#import "DemoCell.h"

#define SCREEN_WIDTH ([[UIScreen mainScreen] bounds].size.width)
#define SCREEN_HEIGHT ([[UIScreen mainScreen] bounds].size.height)


@interface DemoCell()
@property (nonatomic,strong)UIView *bgView;
@end

@implementation DemoCell
- (instancetype)initWithStyle:(UITableViewCellStyle)style reuseIdentifier:(NSString *)reuseIdentifier{
    if(self = [super initWithStyle:style reuseIdentifier:reuseIdentifier]){
        [self createUI];
    }
    return self;
}
//重点在这里
- (void)createUI{
    //创建一个UIView比self.contentView小一圈
    self.bgView  = [[UIView alloc] initWithFrame:CGRectMake(10, 5, SCREEN_WIDTH - 20, 100)];
    self.bgView.backgroundColor = [UIColor whiteColor];
    //给bgView边框设置阴影
    self.bgView.layer.shadowOffset = CGSizeMake(1,1);
    self.bgView.layer.shadowOpacity = 0.3;
    self.bgView.layer.shadowColor = [UIColor blackColor].CGColor;
    [self.contentView addSubview:self.bgView];
}
+ (CGFloat)getHeight{
    //在这里能计算高度,动态调整
    return 100;
}
@end
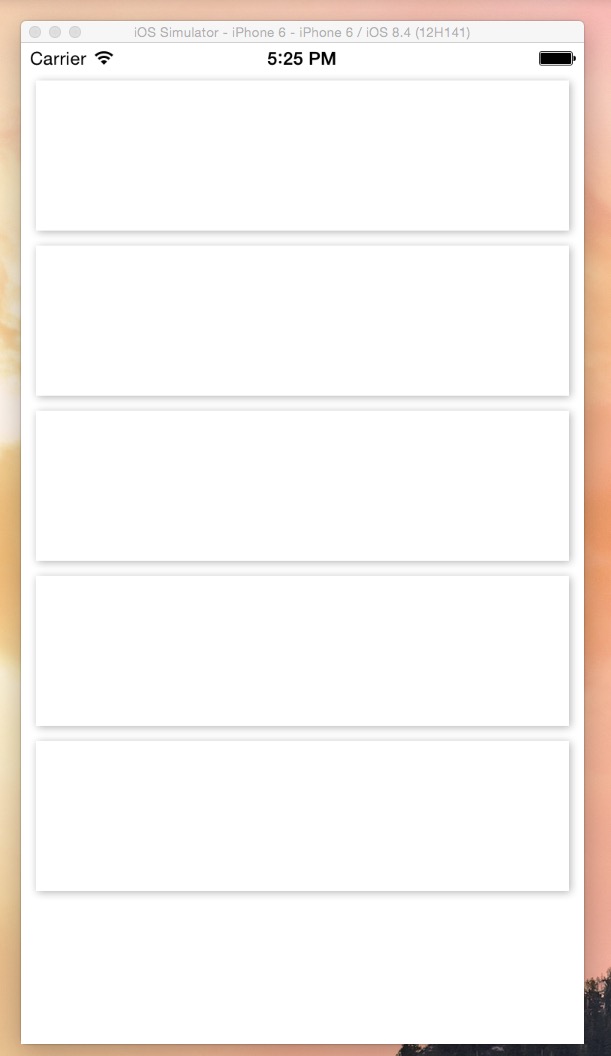
运行起来的效果图,是不是棒棒哒
结束,第一篇博客就写到这里了,就算没人看(还是希望有人看的),我也会写下去的哦...
- 上一篇文章: storyboard
- 下一篇文章: iOS阶段学习第17天笔记(NSFileManager-NSFileHandle-文件操作)
- 一个巧妙的实现悬浮的tableViewHeader的方法
- MACOS上将项目提交到github
- Objective-C中NSArray的基本用法示例
- IOS应用程序启动加载过程(从点击图标到界面
- UIScroView3倍的contentSize,左右Scroll时
- NSCoder
- iOS开发中UISwitch按钮的使用方法简介