
- Android保持屏幕常亮唤醒状态的方法
- 浅析Android手机卫士保存手机安全号码
- Android代码实现图片和文字上下布局
- Android 监听apk安装替换卸载广播的实现代码
- android暂停或停止其他音乐播放器的播放实现代码
- android apk反编译到java源码的实现方法
- Android实现悬浮对话框代码
- Android 不同Activity间数据的传递 Bundle对象的应用
- Android调用相机并将照片存储到sd卡上实现方法
- Android开发笔记之:对实践TDD的一些建议说明
- [Android开发视频教程]03_03_用户定位(一)
- android自定义进度条渐变圆形
- Android编程实现应用强制安装到手机内存的方法
- android 九宫格滑动解锁开机实例源码学习
- Android ScrollView使用代码示例
- ANDROID应用程序的混淆打包分享
- Android学习笔记(一)环境安装及第一个hello world
- [Android开发视频教学]01_21_广播机制(一)
- Android 自动化测试经验分享 深入UiScrollable
- android实现Splash闪屏效果示例
- Android 日志系统Logger源代码详细介绍
- Android App中使用RatingBar实现星级打分功能的教程
- Android编程开发实现多线程断点续传下载器实例
- Android解决dialog弹出时无法捕捉Activity的back事件的方法
- 基于Android实现桌面悬浮清内存app概述
- 关于Android中drawable必知的一些规则
- Android编程之Sdcard相关代码集锦
- 浅析Android 的 MediaPlayer类
- Android编程中Activity的四种启动模式
- android中把文件保存到sdcard代码实例
Android仿ViVO X6 极速闪充动画效果
一直都在看自定义View,经过一个星期的坚持,基本上能够写出一些比较实用的控件效果了,今天天气太热,就待在家里玩手机,然后手机没电了,在充电的时候,看到了手机的充电动画,觉得挺酷,然后自己我就仔细的分析了一下这里的动画内容,就觉得,这个我也能写出来,所以就有了这篇博客。纯属原创。
先看看效果,因为图片的原因,只能看到静态的。
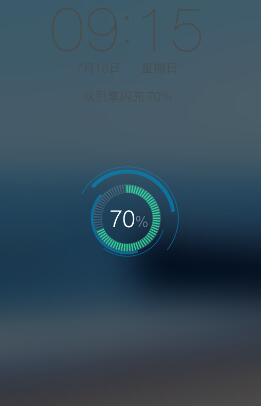
这个就是效果图了。当然了,这么看好像不怎么样,但是配上了动画,还是挺好看的。
自定义控件的话,其实做的多了,运用的多了,就会觉得自定义View,跟在Photo shop 里面画图一样,我们通过建立图层,然后再图层里面绘制自己想要的效果。
这里其实也是一样的,运用到了我前面讲的一些知识,比如这篇:
Android自定义View弧线进度控件,原理上大体相当,结合这次的效果,我们看看,这里面是有四个弧形,两个圆,还有一个类似于时钟刻度的效果。所以知道这些的话,这就比较容易实现了。
首先,新建一个类,取名为VIVOPhone,然后继承自View,重载三个构造函数,然后进入主题。
同样的,我们先看看运用到了哪些变量
 // 定义五个画笔
 private Paint mSmileRing, mBigRing, mInCrilePaint, mInLine, mTextPaint;
 // 控件的高宽
 private float mWidth, mHeight;
 // 矩形的空间
 private RectF mRectF;
 // 四个弧线的开始角度
 private float startAngle = 270, startAngle2 = 270, startAngle3 = 270,
  startAngle4 = 270, sweepAngle = 90;
 // 文字
 private String text = "70%";
 // 文字的大小
 private float tvSize = 80;
 // 刻度的进度
 private float progress;
然后我们开始初始化数据。
private void initView() {
 mSmileRing = new Paint();
 mSmileRing.setAntiAlias(true);
 mSmileRing.setStrokeWidth(5);
 mSmileRing.setStyle(Style.STROKE);
 mSmileRing.setColor(Color.parseColor("#12ADFF"));

 mBigRing = new Paint();
 mBigRing.setAntiAlias(true);
 mBigRing.setStrokeWidth(20);
 mBigRing.setStyle(Style.STROKE);
 mBigRing.setColor(Color.parseColor("#12ADFF"));

 mInCrilePaint = new Paint();
 mInCrilePaint.setAntiAlias(true);
 mInCrilePaint.setStrokeWidth((float) 0.5);
 mInCrilePaint.setStyle(Style.STROKE);
 mInCrilePaint.setColor(Color.parseColor("#eeeeee"));

 mInLine = new Paint();
 mInLine.setAntiAlias(true);
 mInLine.setStrokeWidth(3);
 mInLine.setColor(Color.parseColor("#00ff00"));

 mTextPaint = new Paint();
 mTextPaint.setAntiAlias(true);
 mTextPaint.setStrokeWidth(3);
 mTextPaint.setTextSize(tvSize);
 mTextPaint.setColor(Color.parseColor("#ffffff"));
 }
这里主要是对画笔进行初始化,包括设置大小、宽度、样式、颜色等等。这个方法,最后还是要在构造函数里面调用。
画笔初始化好了,接下来就看看怎么给变量赋值;
一样的,我们还是在onSizeChange()方法里面写赋值的操作。代码如下:
 @Override
 protected void onSizeChanged(int w, int h, int oldw, int oldh) {
 super.onSizeChanged(w, h, oldw, oldh);
 mWidth = w;
 mHeight = h;

 }
这里很简单,就是给高跟宽赋值。
好了,最后看看onDraw方法是怎么写的。
 @Override
 protected void onDraw(Canvas canvas) {
 super.onDraw(canvas);
 canvasOutArc1(canvas, mRectF);
 canvasOutArc2(canvas, mRectF);
 canvasOutArc3(canvas, mRectF);
 canvasOutArc4(canvas, mRectF);
 drawCircle(canvas);
 drawCircleIn(canvas);
 canvasDrawText(canvas);

 }
没错,我这里把每一个的绘制都抽成了方法,这样是为了更好的管理和阅读。看到一个:
 /**
 * 绘制最外面的弧线
 *
 * @param canvas
 */
 private void canvasOutArc1(Canvas canvas, RectF mRectF) {
 mRectF = new RectF((float) (mWidth * 0.1), (float) (mWidth * 0.1),
  (float) (mWidth * 0.9), (float) (mWidth * 0.9));
 canvas.drawArc(mRectF, startAngle, sweepAngle + 90, false, mSmileRing);
 }
这个是最外层的圆,接下来就是第二个,第三个,第四个,我全部列出来。
/**
 * 绘制外层的第二个
 *
 * @param canvas
 * @param mRectF
 */
 private void canvasOutArc2(Canvas canvas, RectF mRectF) {
 mRectF = new RectF((float) (mWidth * 0.14), (float) (mWidth * 0.14),
  (float) (mWidth * 0.85), (float) (mWidth * 0.85));
 canvas.drawArc(mRectF, startAngle2, sweepAngle + 30, false, mBigRing);
 }
第三个:
/**
 * 绘制里面第二个小的
 *
 * @param canvas
 */
 private void canvasOutArc3(Canvas canvas, RectF mRectF) {
 mRectF = new RectF((float) (mWidth * 0.22), (float) (mWidth * 0.22),
  (float) (mWidth * 0.795), (float) (mWidth * 0.795));
 canvas.drawArc(mRectF, startAngle3, sweepAngle, false, mSmileRing);
 }
第四个:
 /**
 * 绘制里面第二个小的
 *
 * @param canvas
 */
 private void canvasOutArc4(Canvas canvas, RectF mRectF) {
 mRectF = new RectF((float) (mWidth * 0.255), (float) (mWidth * 0.255),
  (float) (mWidth * 0.75), (float) (mWidth * 0.75));
 canvas.drawArc(mRectF, startAngle4, sweepAngle, false, mBigRing);
 }
然后就是两个圆了:
第一个圆,这里面还包含了锯齿:
// 绘制内切圆和锯齿
 private void drawCircle(Canvas canvas) {
 float radius = (float) (mHeight - (mHeight * 0.3) * 2 - (mWidth * 0.17));
 float yuanX = (float) (mHeight / 2);
 float yuanY = (float) (mWidth / 2);

 canvas.drawCircle(yuanX, yuanY, radius, mInCrilePaint);
 canvas.save();

 float nowWidth = (float) (getMeasuredWidth());
 float nowHeight = getMeasuredHeight();
 for (int i = 0; i < 72; i++) {
  // canvas.drawLine(nowWidth / 2, nowHeight / 2 - nowWidth / 2,
  // nowWidth / 2, nowHeight / 2 - nowWidth / 2 + 30, mInLine);

  if (i >= progress) {
  mInLine.setColor(Color.parseColor("#555555"));
  } else {
  mInLine.setColor(Color.parseColor("#00ff00"));
  }

  canvas.drawLine(nowWidth / 2,
   (float) (nowHeight / 2 - nowWidth / 2 + mWidth / 3.7),
   nowWidth / 2, (float) (nowHeight / 2 - nowWidth / 2
    + mWidth * 0.05 + mWidth / 3.7), mInLine);

  canvas.rotate(5, getWidth() / 2, getHeight() / 2);

 }

 }
第二个圆:
// 绘制最里面的圆
 private void drawCircleIn(Canvas canvas) {
 float radius = (float) (mHeight - (mHeight * 0.3) * 2 - (mWidth * 0.22));
 float yuanX = (float) (mHeight / 2);
 float yuanY = (float) (mWidth / 2);

 canvas.drawCircle(yuanX, yuanY, radius, mInCrilePaint);
 canvas.save();

 }
最后暴露给外面一个方法,用于动画效果:
 public void setData(int startAngle, float d) {
 this.startAngle = startAngle;
 this.startAngle2 = 360 - startAngle;
 this.startAngle3 = startAngle;
 this.startAngle4 = 360 - startAngle;
 progress = d / 4;
 postInvalidateDelayed(500);
 }
这里为了效果更明显,我让它五毫秒的速度更新UI,这里就是View的全部内容,下面,我把所有的代码都列出来:
布局文件:
<RelativeLayout xmlns:android="http://schemas.android.com/apk/res/android"
 xmlns:tools="http://schemas.android.com/tools"
 android:layout_width="match_parent"
 android:layout_height="match_parent"
 android:background="@drawable/bg"
 tools:context=".MainActivity" >

 <com.example.vivoopen.weight.VivoView
 android:id="@+id/vivo"
 android:layout_width="180dip"
 android:layout_height="180dip"
 android:layout_centerInParent="true" />

</RelativeLayout>
MainActivity.java:
public class MainActivity extends Activity {
 private VivoView view;
 private boolean isRun = true;

 @Override
 protected void onCreate(Bundle savedInstanceState) {
 super.onCreate(savedInstanceState);
 setContentView(R.layout.activity_main);
 view = (VivoView) findViewById(R.id.vivo);

 new Thread(new Runnable() {
  public void run() {
  synchronized (view) {

   while (isRun) {
   Message msg;
   for (int i = 0; i < n2; i = i + 10) {
    msg = new Message();
    msg.obj = i;
    SystemClock.sleep(100);
    msg.what = 1;
    handler.sendMessage(msg);
   }
   msg = new Message();
   msg.what = 2;
   handler.sendMessage(msg);
   }
  }
  }
 }).start();

 }

 int n2 = 2;
 private Handler handler = new Handler() {
 public void handleMessage(android.os.Message msg) {

  switch (msg.what) {
  case 1:
  int a = (Integer) msg.obj;
  view.setData(a, a);
  break;
  case 2:
  n2 = 359;
  break;
  default:
  break;
  }

 };
 };

}
VivoView.java:
public class VivoView extends View {
 // 定义五个画笔
 private Paint mSmileRing, mBigRing, mInCrilePaint, mInLine, mTextPaint;
 // 控件的高宽
 private float mWidth, mHeight;
 // 矩形的空间
 private RectF mRectF;
 // 四个弧线的开始角度
 private float startAngle = 270, startAngle2 = 270, startAngle3 = 270,
  startAngle4 = 270, sweepAngle = 90;
 // 文字
 private String text = "70%";
 // 文字的大小
 private float tvSize = 80;
 // 刻度的进度
 private float progress;

 public VivoView(Context context, AttributeSet attrs, int defStyle) {
 super(context, attrs, defStyle);
 initView();

 }

 public VivoView(Context context, AttributeSet attrs) {
 super(context, attrs);
 initView();
 }

 public VivoView(Context context) {
 super(context);
 initView();
 }

 private void initView() {
 mSmileRing = new Paint();
 mSmileRing.setAntiAlias(true);
 mSmileRing.setStrokeWidth(5);
 mSmileRing.setStyle(Style.STROKE);
 mSmileRing.setColor(Color.parseColor("#12ADFF"));

 mBigRing = new Paint();
 mBigRing.setAntiAlias(true);
 mBigRing.setStrokeWidth(20);
 mBigRing.setStyle(Style.STROKE);
 mBigRing.setColor(Color.parseColor("#12ADFF"));

 mInCrilePaint = new Paint();
 mInCrilePaint.setAntiAlias(true);
 mInCrilePaint.setStrokeWidth((float) 0.5);
 mInCrilePaint.setStyle(Style.STROKE);
 mInCrilePaint.setColor(Color.parseColor("#eeeeee"));

 mInLine = new Paint();
 mInLine.setAntiAlias(true);
 mInLine.setStrokeWidth(3);
 mInLine.setColor(Color.parseColor("#00ff00"));

 mTextPaint = new Paint();
 mTextPaint.setAntiAlias(true);
 mTextPaint.setStrokeWidth(3);
 mTextPaint.setTextSize(tvSize);
 mTextPaint.setColor(Color.parseColor("#ffffff"));
 }

 @Override
 protected void onSizeChanged(int w, int h, int oldw, int oldh) {
 super.onSizeChanged(w, h, oldw, oldh);
 mWidth = w;
 mHeight = h;

 }

 @Override
 protected void onDraw(Canvas canvas) {
 super.onDraw(canvas);
 canvasOutArc1(canvas, mRectF);
 canvasOutArc2(canvas, mRectF);
 canvasOutArc3(canvas, mRectF);
 canvasOutArc4(canvas, mRectF);
 drawCircle(canvas);
 drawCircleIn(canvas);
 canvasDrawText(canvas);

 }

 // 绘制文字
 private void canvasDrawText(Canvas canvas) {
 float textSize = mTextPaint.measureText(text);
 float x = mWidth / 2 - textSize / 2;
 float y = mHeight / 2 + textSize / 5;
 canvas.drawText(text, x, y, mTextPaint);
 }

 // 绘制最里面的圆
 // 绘制内切圆和锯齿
 private void drawCircleIn(Canvas canvas) {
 float radius = (float) (mHeight - (mHeight * 0.3) * 2 - (mWidth * 0.22));
 float yuanX = (float) (mHeight / 2);
 float yuanY = (float) (mWidth / 2);

 canvas.drawCircle(yuanX, yuanY, radius, mInCrilePaint);
 canvas.save();

 }

 // 绘制内切圆和锯齿
 private void drawCircle(Canvas canvas) {
 float radius = (float) (mHeight - (mHeight * 0.3) * 2 - (mWidth * 0.17));
 float yuanX = (float) (mHeight / 2);
 float yuanY = (float) (mWidth / 2);

 canvas.drawCircle(yuanX, yuanY, radius, mInCrilePaint);
 canvas.save();

 float nowWidth = (float) (getMeasuredWidth());
 float nowHeight = getMeasuredHeight();
 for (int i = 0; i < 72; i++) {
  // canvas.drawLine(nowWidth / 2, nowHeight / 2 - nowWidth / 2,
  // nowWidth / 2, nowHeight / 2 - nowWidth / 2 + 30, mInLine);

  if (i >= progress) {
  mInLine.setColor(Color.parseColor("#555555"));
  } else {
  mInLine.setColor(Color.parseColor("#00ff00"));
  }

  canvas.drawLine(nowWidth / 2,
   (float) (nowHeight / 2 - nowWidth / 2 + mWidth / 3.7),
   nowWidth / 2, (float) (nowHeight / 2 - nowWidth / 2
    + mWidth * 0.05 + mWidth / 3.7), mInLine);

  canvas.rotate(5, getWidth() / 2, getHeight() / 2);

 }

 }

 /**
 * 绘制最外面的弧线
 *
 * @param canvas
 */
 private void canvasOutArc1(Canvas canvas, RectF mRectF) {
 mRectF = new RectF((float) (mWidth * 0.1), (float) (mWidth * 0.1),
  (float) (mWidth * 0.9), (float) (mWidth * 0.9));
 canvas.drawArc(mRectF, startAngle, sweepAngle + 90, false, mSmileRing);
 }

 /**
 * 绘制外层的第二个
 *
 * @param canvas
 * @param mRectF
 */
 private void canvasOutArc2(Canvas canvas, RectF mRectF) {
 mRectF = new RectF((float) (mWidth * 0.14), (float) (mWidth * 0.14),
  (float) (mWidth * 0.85), (float) (mWidth * 0.85));
 canvas.drawArc(mRectF, startAngle2, sweepAngle + 30, false, mBigRing);
 }

 /**
 * 绘制里面第二个小的
 *
 * @param canvas
 */
 private void canvasOutArc3(Canvas canvas, RectF mRectF) {
 mRectF = new RectF((float) (mWidth * 0.22), (float) (mWidth * 0.22),
  (float) (mWidth * 0.795), (float) (mWidth * 0.795));
 canvas.drawArc(mRectF, startAngle3, sweepAngle, false, mSmileRing);
 }

 /**
 * 绘制里面第二个小的
 *
 * @param canvas
 */
 private void canvasOutArc4(Canvas canvas, RectF mRectF) {
 mRectF = new RectF((float) (mWidth * 0.255), (float) (mWidth * 0.255),
  (float) (mWidth * 0.75), (float) (mWidth * 0.75));
 canvas.drawArc(mRectF, startAngle4, sweepAngle, false, mBigRing);
 }

 public void setData(int startAngle, float d) {
 this.startAngle = startAngle;
 this.startAngle2 = 360 - startAngle;
 this.startAngle3 = startAngle;
 this.startAngle4 = 360 - startAngle;
 progress = d / 4;
 postInvalidateDelayed(500);
 }

}
以上就是本文的全部内容,希望对大家的学习有所帮助,也希望大家多多支持脚本之家。
- 上一篇文章: Android绘制音乐播放器示波器
- 下一篇文章: Android自定义View弧线进度控件
- Android 桌面Widget开发要点解析(时间日期W
- 深入浅析 Android Fragment(上篇)
- Android从xml加载到View对象过程解析
- Android开源组件SlidingMenu侧滑菜单使用介
- Android编程实现获取图片资源的四种方法
- Android 第三方应用接入微信平台研究情况分
- Android获取经纬度计算距离介绍