
- Action获取请求参数的三种方式
- android 多点触摸图片缩放的具体实现方法
- 让Android中RadioGroup不显示在输入法上面的办法
- Android输入法弹出时覆盖输入框问题的解决方法
- Android使用selector修改TextView中字体颜色和背景色的方法
- Android三种GSM手机定位技术分析
- Android简单音乐播放实例
- Android实现语音识别代码
- Android 工程内嵌资源文件的两种方法
- Android操作系统的架构设计分析
- Android仿QQ聊天撒花特效 很真实
- Android中使用am命令实现在命令行启动程序详解
- Android绘制音乐播放器示波器
- Android开发:TextView加入滚动条示例
- Android AIDL和远程Service调用示例代码
- 在Android模拟器上模拟GPS功能总是null的解决方法
- android 拍照和上传的实现代码
- Android中实现为TextView添加多个可点击的文本
- Android自定义格式显示Button的布局思路
- Android中GPS定位的用法实例
- Android编程实现图标拖动效果的方法
- Android操作Html打开其他APP
- Android、iOS和Windows Phone中的推送技术详解
- Android Studio项目中导入开源库的方法
- Android编程之在SD卡上进行文件读写操作实例详解
- 教你如何使用platform密钥对apk进行签名
- 基于Android中dp和px之间进行转换的实现代码
- Android编程实现给Button添加图片和文字的方法
- Android使用文件进行数据存储的方法
- Android应用中绘制圆形头像的方法解析
Android采用双缓冲技术实现画板
作者:佚名 Android开发编辑:admin 更新时间:2022-07-23
本文实例为大家分享了Android实现画板的具体代码,采用的技术是双缓冲技术,供大家参考,具体内容如下
1.双缓冲技术的概念
所谓的双缓冲技术其实很简单,当程序需要在指定的View上进行绘制时,程序并不需要直接绘制到该View组件,而是先绘制到一个内存中的Bitmap图片上(就是缓冲),等内存中的Bitmap绘制好之后,再一次性将Bitmap绘制到View组件上。
2.Android采用双缓冲实现画板
实现的思路:
1).定义一个内存中图片,将他作为缓冲区Bitmap cacheBitmap = null;
2).定义缓冲区Cache的Canvas对象 Canvas cacheCanvas = null;
3).设置cacheCanvas将会绘制到内存的bitmap上。
cacheCanvas.setBitmap(cacheBitmap);
4). 将cacheBitmap绘制到该View上.
canvas.drawBitmap(cacheBitmap,0,0,p);
3.代码实现
package com.lidong.android_ibrary.view;

import android.content.Context;
import android.graphics.Bitmap;
import android.graphics.Canvas;
import android.graphics.Color;
import android.graphics.Paint;
import android.graphics.Path;
import android.util.AttributeSet;
import android.view.MotionEvent;
import android.view.View;

/**
*@类名 : DrawView
*@描述 : 使用双缓存技术实现绘制
*@时间 : 2016/4/26 9:18
*@作者: 李东
*@邮箱 : [email protected]
*@company: chni
*/
public class DrawView extends View {

 float preX;
 float preY;
 private Path path;
 private Paint paint = null;
 private int VIEW_WIDTH = 800;
 private int VIEW_HEIGHT = 600;
 //定义一个内存中图片,将他作为缓冲区
 Bitmap cacheBitmap = null;
 //定义缓冲区Cache的Canvas对象
 Canvas cacheCanvas = null;

 public DrawView(Context context) {
  this(context,null);
 }

 public DrawView(Context context, AttributeSet attrs) {
  super(context, attrs);
  //创建一个与该VIew相同大小的缓冲区
  cacheBitmap = Bitmap.createBitmap(VIEW_WIDTH,VIEW_HEIGHT,Bitmap.Config.ARGB_8888);
  //创建缓冲区Cache的Canvas对象
  cacheCanvas = new Canvas();
  path = new Path();
  //设置cacheCanvas将会绘制到内存的bitmap上
  cacheCanvas.setBitmap(cacheBitmap);
  paint = new Paint();
  paint.setColor(Color.RED);
  paint.setFlags(Paint.DITHER_FLAG);
  paint.setStyle(Paint.Style.STROKE);
  paint.setStrokeWidth(5);
  paint.setAntiAlias(true);
  paint.setDither(true);
 }

 @Override
 protected void onDraw(Canvas canvas) {
  Paint p = new Paint();
  //将cacheBitmap绘制到该View
  canvas.drawBitmap(cacheBitmap,0,0,p);
  canvas.drawPath(path,paint);
 }


 @Override
 public boolean onTouchEvent(MotionEvent event) {
  //获取拖动时间的发生位置
   float x = event.getX();
   float y = event.getY();
  switch (event.getAction()){
   case MotionEvent.ACTION_DOWN:
    path.moveTo(x,y);
    preX = x;
    preY = y;
    break;
   case MotionEvent.ACTION_MOVE:
    path.quadTo(preX,preY,x,y);
    preX = x;
    preY = y;
    break;
   case MotionEvent.ACTION_UP:
    //这是是调用了cacheBitmap的Canvas在绘制
    cacheCanvas.drawPath(path,paint);
    path.reset();
    break;
  }
  invalidate();//在UI线程刷新VIew
  return true;
 }
}
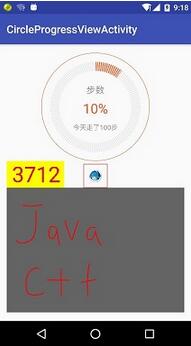
4.实现的效果
代码下载:Android实现画板代码
以上就是本文的全部内容,希望对大家学习Android软件编程有所帮助。
- 上一篇文章: Android开发之毛玻璃效果实例代码
- 下一篇文章: Android通过手势实现答题器翻页效果
- Android中关于Notification及NotificationM
- Android中使用ListView绘制自定义表格技巧分
- Android开发使用UncaughtExceptionHandler捕
- Android 游戏开发入门简单示例
- 在Android线程池里运行代码任务实例
- Android编程之判断SD卡状态的方法
- Android中制作进度框和环形进度条的简单实例