
- ReactiveCocoa代码实践之-UI组件的RAC信号操作
- 关于Android中drawable必知的一些规则
- Android字体设置及Roboto字体使用方法
- Android滑动优化高仿QQ6.0侧滑菜单(滑动优化)
- android实用工具类分享(获取内存/检查网络/屏幕高度/手机分辨率)
- Android中 自定义数据绑定适配器BaseAdapter的方法
- Android编程开发之TextView单击链接弹出Activity的方法
- [Android开发视频教学]01_15_Handler的使用(二)
- [Android开发视频教程]02_03_常见控件(六)
- phonegap教程使用jspdf库在应用中生成pdf文件(pdf生成方法)
- Android点击Button实现功能的几种方法总结
- Android开发中CheckBox的简单用法示例
- Android Studio 1.2版安装设置图文教程
- Android下通过httpClient发送GET和POST请求的实例代码
- web app与原生app的区别
- Android开发自学笔记(六):声明权限和Activity
- Android对话框自定义标题 对话框标题美化操作
- Android Socket服务端与客户端用字符串的方式互相传递图片的方法
- 在android开发中进行数据存储与访问的多种方式介绍
- Android 完全退出当前应用程序的四种方法
- Android编程实现根据不同日期计算天数差的方法
- Android 游戏引擎libgdx 资源加载进度百分比显示案例分析
- Android下Activity全屏显示实现方法
- Android 5.0正式推送 并提供系统镜像下载
- Android中使用GridView进行应用程序UI布局的教程
- Android EditText限制输入字数的方法
- [Android开发视频教学]01_19_ContentProvider初步
- Android编程实现AIDL(跨进程通信)的方法详解
- Android下保存简单网页到本地(包括简单图片链接转换)实现代码
- Android编程实现给Button添加图片和文字的方法
Android 利用方向传感器实现指南针具体步骤
作者:佚名 Android开发编辑:admin 更新时间:2022-07-23
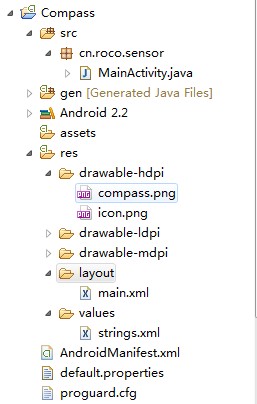
step1:新建一个项目Compass,并将一张指南针图片导入到res/drawable-hdpi目录中
step2:设计应用的UI界面,main.xml
复制代码 代码如下:
<SPAN style="FONT-SIZE: 18px"><STRONG><?xml version="1.0" encoding="utf-8"?>
<LinearLayout xmlns:android="http://schemas.android.com/apk/res/android"
android:orientation="vertical"
android:layout_width="fill_parent"
android:layout_height="fill_parent"
android:gravity="center"
>
<ImageView
android:layout_width="wrap_content"
android:layout_height="wrap_content"
android:src="@drawable/compass"
android:id="@+id/imageView"
/>
</LinearLayout></STRONG></SPAN>
step3:MainActivity.java
复制代码 代码如下:
import android.app.Activity;
import android.content.Context;
import android.hardware.Sensor;
import android.hardware.SensorEvent;
import android.hardware.SensorEventListener;
import android.hardware.SensorManager;
import android.os.Bundle;
import android.view.animation.Animation;
import android.view.animation.RotateAnimation;
import android.widget.ImageView;
public class MainActivity extends Activity {
private ImageView imageView;
/** 传感器管理器 */
private SensorManager manager;
private SensorListener listener = new SensorListener();
@Override
public void onCreate(Bundle savedInstanceState) {
super.onCreate(savedInstanceState);
setContentView(R.layout.main);
imageView = (ImageView) this.findViewById(R.id.imageView);
imageView.setKeepScreenOn(true);//屏幕高亮
//获取系统服务(SENSOR_SERVICE)返回一个SensorManager 对象
manager = (SensorManager) getSystemService(Context.SENSOR_SERVICE);
}
@Override
protected void onResume() {
/**
* 获取方向传感器
* 通过SensorManager对象获取相应的Sensor类型的对象
*/
Sensor sensor = manager.getDefaultSensor(Sensor.TYPE_ORIENTATION);
//应用在前台时候注册监听器
manager.registerListener(listener, sensor,
SensorManager.SENSOR_DELAY_GAME);
super.onResume();
}
@Override
protected void onPause() {
//应用不在前台时候销毁掉监听器
manager.unregisterListener(listener);
super.onPause();
}
private final class SensorListener implements SensorEventListener {
private float predegree = 0;
@Override
public void onSensorChanged(SensorEvent event) {
/**
* values[0]: x-axis 方向加速度
values[1]: y-axis 方向加速度
values[2]: z-axis 方向加速度
*/
float degree = event.values[0];// 存放了方向值
/**动画效果*/
RotateAnimation animation = new RotateAnimation(predegree, degree,
Animation.RELATIVE_TO_SELF,0.5f,Animation.RELATIVE_TO_SELF,0.5f);
animation.setDuration(200);
imageView.startAnimation(animation);
predegree=-degree;
/**
float x=event.values[SensorManager.DATA_X];
float y=event.values[SensorManager.DATA_Y];
float z=event.values[SensorManager.DATA_Z];
Log.i("XYZ", "x="+(int)x+",y="+(int)y+",z="+(int)z);
*/
}
@Override
public void onAccuracyChanged(Sensor sensor, int accuracy) {
}
}
}
step4:AndroidManifest.xml
复制代码 代码如下:
<SPAN style="FONT-SIZE: 18px"><STRONG><?xml version="1.0" encoding="utf-8"?>
<manifest xmlns:android="http://schemas.android.com/apk/res/android"
package="cn.roco.sensor"
android:versionCode="1"
android:versionName="1.0">
<uses-sdk android:minSdkVersion="8" />
<application android:icon="@drawable/icon" android:label="@string/app_name">
<activity android:name="MainActivity"
android:label="@string/app_name">
<intent-filter>
<action android:name="android.intent.action.MAIN" />
<category android:name="android.intent.category.LAUNCHER" />
</intent-filter>
</activity>
</application>
</manifest></STRONG></SPAN>
- 上一篇文章: Android利用ViewPager实现滑动广告板实例源码
- 下一篇文章: Android利用方向传感器获得手机的相对角度实例说明
- 分享40条Android开发的优化建议
- 完整的Android MVP开发之旅
- Android 嵌套Fragment的使用实例代码
- Android实现授权访问网页的方法
- 分享实现Android图片选择的两种方式
- Android中查看USB连接的外接设备信息的代码
- Android开发教程之调用摄像头功能的方法详解