
- OC开发中运用到的枚举
- IOS自动布局-UIStackPanel和UIGridPanel(四)
- Swift使用FMDB操作SQLite
- iOSApp上架流程
- iOS警告收录及科学快速的消除方法
- IOS之swift第一课基础代码
- UITableViewDataSourceTableView數據源協議
- 记录自己集成支付宝遇到的问题及解决方法
- iOS - UIButton(UIEdgeInsets)/设置button上的文字和图片上下垂直居中对齐
- (3/18)重学Standford_iOS7开发_Objective-C_课程笔记
- 从零开始学ios开发(十二):TableViews(上)
- Cocos2d-X3.0刨根问底(四)-----内存管理源码分析
- 工作问题:如何获取汉字拼音首字母?一般用于通讯录建设
- FIR.imWeekly-让炫酷UI为APP增色
- 加载带有手势识别器的XIB文件需注意哪些问题
- iOSProgrammingUIGestureRecognizerandUIMenuController
- IOS开发之高级功能---远程推送
- ios英语口语800句应用源码
- iOSdouble类型不稳定,及解决办法!
- IOS 解决推送本地国际化 loc-key 本地化失败的问题
- Cell的重用机制
- iOS开发日记43-XCode7免证书真机调试
- iOS非ARC基本内存管理系列总结6-设计微博模型
- objective-c系列-NSDictionary&NSMutableDictionary
- iOS实现消息推送及原理分析
- 怎样把SEL放进NSArray里
- iOS应用程序内部国际化,不跟随系统语言
- 不同android版本关于actionBar右面省略菜单的强制转换
- ios下移动文件方法汇总
- 服务器文件下载
解析iOS应用的UI开发中懒加载和xib的简单使用方法
懒加载
1.懒加载基本
懒加载——也称为延迟加载,即在需要的时候才加载(效率低,占用内存小)。所谓懒加载,写的是其get方法.
注意:如果是懒加载的话则一定要注意先判断是否已经有了,如果没有那么再去进行实例化
2.使用懒加载的好处:
(1)不必将创建对象的代码全部写在viewDidLoad方法中,代码的可读性更强
(2)每个控件的getter方法中分别负责各自的实例化处理,代码彼此之间的独立性强,松耦合
3.代码示例
复制代码 代码如下:
//
// YYViewController.m
// 03-图片浏览器初步
//
// Created by apple on 14-5-21.
// Copyright (c) 2014年 itcase. All rights reserved.
//
#import "YYViewController.h"
#define POTOIMGW 200
#define POTOIMGH 300
#define POTOIMGX 60
#define POTOIMGY 50
@interface YYViewController ()
@property(nonatomic,strong)UILabel *firstlab;
@property(nonatomic,strong)UILabel *lastlab;
@property(nonatomic,strong)UIImageView *icon;
@property(nonatomic,strong)UIButton *leftbtn;
@property(nonatomic,strong)UIButton *rightbtn;
@property(nonatomic,strong)NSArray *array;
@property(nonatomic ,assign)int i;
-(void)change;
@end
复制代码 代码如下:
@implementation YYViewController
- (void)viewDidLoad
{
[super viewDidLoad];
[self change];
}
-(void)change
{
[self.firstlab setText:[NSString stringWithFormat:@"%d/5",self.i+1]];
//先get再set
self.icon.image=[UIImage imageNamed:self.array[self.i][@"name"]];
self.lastlab.text=self.array[self.i][@"desc"];
self.leftbtn.enabled=(self.i!=0);
self.rightbtn.enabled=(self.i!=4);
}
//延迟加载
/**1.图片的序号标签*/
-(UILabel *)firstlab
{
//判断是否已经有了,若没有,则进行实例化
if (!_firstlab) {
_firstlab=[[UILabel alloc]initWithFrame:CGRectMake(20, 10, 300, 30)];
[_firstlab setTextAlignment:NSTextAlignmentCenter];
[self.view addSubview:_firstlab];
}
return _firstlab;
}
/**2.图片控件的延迟加载*/
-(UIImageView *)icon
{
//判断是否已经有了,若没有,则进行实例化
if (!_icon) {
_icon=[[UIImageView alloc]initWithFrame:CGRectMake(POTOIMGX, POTOIMGY, POTOIMGW, POTOIMGH)];
UIImage *image=[UIImage imageNamed:@"biaoqingdi"];
_icon.image=image;
[self.view addSubview:_icon];
}
return _icon;
}
/**3.描述控件的延迟加载*/
-(UILabel *)lastlab
{
//判断是否已经有了,若没有,则进行实例化
if (!_lastlab) {
_lastlab=[[UILabel alloc]initWithFrame:CGRectMake(20, 400, 300, 30)];
[_lastlab setTextAlignment:NSTextAlignmentCenter];
[self.view addSubview:_lastlab];
}
return _lastlab;
}
/**4.左键按钮的延迟加载*/
-(UIButton *)leftbtn
{
//判断是否已经有了,若没有,则进行实例化
if (!_leftbtn) {
_leftbtn=[UIButton buttonWithType:UIButtonTypeCustom];
_leftbtn.frame=CGRectMake(0, self.view.center.y, 40, 40);
[_leftbtn setBackgroundImage:[UIImage imageNamed:@"left_normal"] forState:UIControlStateNormal];
[_leftbtn setBackgroundImage:[UIImage imageNamed:@"left_highlighted"] forState:UIControlStateHighlighted];
[self.view addSubview:_leftbtn];
[_leftbtn addTarget:self action:@selector(leftclick:) forControlEvents:UIControlEventTouchUpInside];
}
return _leftbtn;
}
/**5.右键按钮的延迟加载*/
-(UIButton *)rightbtn
{
if (!_rightbtn) {
_rightbtn=[UIButton buttonWithType:UIButtonTypeCustom];
_rightbtn.frame=CGRectMake(POTOIMGX+POTOIMGW+10, self.view.center.y, 40, 40);
[_rightbtn setBackgroundImage:[UIImage imageNamed:@"right_normal"] forState:UIControlStateNormal];
[_rightbtn setBackgroundImage:[UIImage imageNamed:@"right_highlighted"] forState:UIControlStateHighlighted];
[self.view addSubview:_rightbtn];
[_rightbtn addTarget:self action:@selector(rightclick:) forControlEvents:UIControlEventTouchUpInside];
}
return _rightbtn;
}
//array的get方法
-(NSArray *)array
{
if (_array==nil) {
NSString *path=[[NSBundle mainBundle] pathForResource:@"data" ofType:@"plist"];
_array=[[NSArray alloc]initWithContentsOfFile:path];
}
return _array;
}
-(void)rightclick:(UIButton *)btn
{
self.i++;
[self change];
}
-(void)leftclick:(UIButton *)btn
{
self.i--;
[self change];
}
@end
xib的简单使用
一、简单介绍
xib和storyboard的比较,一个轻量级一个重量级。
共同点:
都用来描述软件界面
都用Interface Builder工具来编辑
不同点:
Xib是轻量级的,用来描述局部的UI界面
Storyboard是重量级的,用来描述整个软件的多个界面,并且能展示多个界面之间的跳转关系
二、xib的简单使用
1.建立xib文件

建立的xib文件命名为appxib.xib

2.对xib进行设置
根据程序的需要,这里把view调整为自由布局
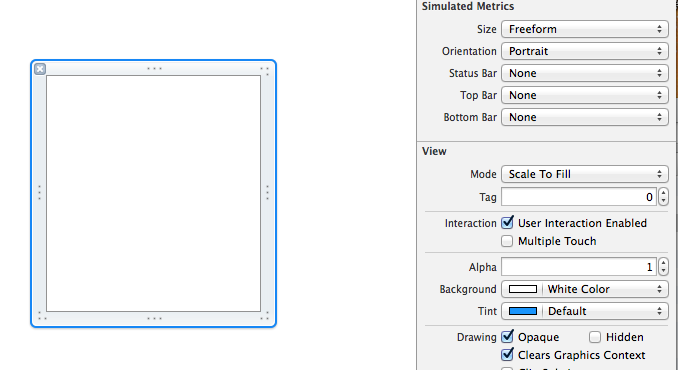
建立view模型(设置长宽等参数)
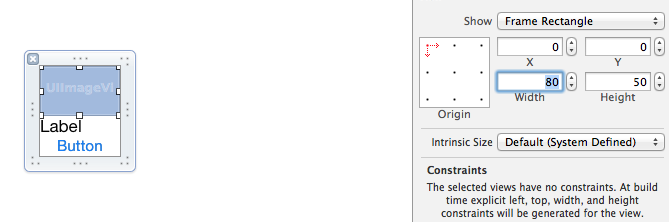
调整布局和内部的控件
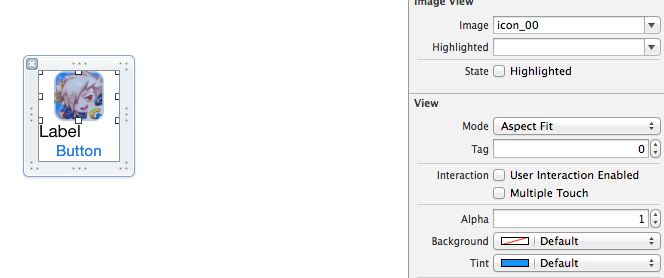
完成后的单个view
3.使用xib文件的代码示例
YYViewController.m文件代码如下:
复制代码 代码如下:
//
// YYViewController.m
// 10-xib文件的使用
//
// Created by apple on 14-5-24.
// Copyright (c) 2014年 itcase. All rights reserved.
//
#import "YYViewController.h"
#import "YYapp.h"
@interface YYViewController ()
@property(nonatomic,strong)NSArray *app;
@end
复制代码 代码如下:
@implementation YYViewController
//1.加载数据信息
-(NSArray *)app
{
if (!_app) {
NSString *path=[[NSBundle mainBundle]pathForResource:@"app.plist" ofType:nil];
NSArray *temparray=[NSArray arrayWithContentsOfFile:path];
//字典转模型
NSMutableArray *arrayM=[NSMutableArray array ];
for (NSDictionary *dict in temparray) {
[arrayM addObject:[YYapp appWithDict:dict]];
}
_app=arrayM;
}
return _app;
}
//创建界面原型
- (void)viewDidLoad
{
[super viewDidLoad];
NSLog(@"%d",self.app.count);
//九宫格布局
int totalloc=3;
CGFloat appviewW=80;
CGFloat appviewH=90;
CGFloat margin=(self.view.frame.size.width-totalloc*appviewW)/(totalloc+1);
int count=self.app.count;
for (int i=0; i<count; i++) {
int row=i/totalloc;
int loc=i%totalloc;
CGFloat appviewX=margin + (margin +appviewW)*loc;
CGFloat appviewY=margin + (margin +appviewH)*row;
YYapp *app=self.app[i];
//拿出xib视图
NSArray *apparray= [[NSBundle mainBundle]loadNibNamed:@"appxib" owner:nil options:nil];
UIView *appview=[apparray firstObject];
//加载视图
appview.frame=CGRectMake(appviewX, appviewY, appviewW, appviewH);
UIImageView *appviewImg=(UIImageView *)[appview viewWithTag:1];
appviewImg.image=app.image;
UILabel *appviewlab=(UILabel *)[appview viewWithTag:2];
appviewlab.text=app.name;
UIButton *appviewbtn=(UIButton *)[appview viewWithTag:3];
[appviewbtn addTarget:self action:@selector(appviewbtnClick:) forControlEvents:UIControlEventTouchUpInside];
appviewbtn.tag=i;
[self.view addSubview:appview];
}
}
/**按钮的点击事件*/
-(void)appviewbtnClick:(UIButton *)btn
{
YYapp *apps=self.app[btn.tag];
UILabel *showlab=[[UILabel alloc]initWithFrame:CGRectMake(60, 450, 200, 20)];
[showlab setText:[NSString stringWithFormat: @"%@下载成功",apps.name]];
[showlab setBackgroundColor:[UIColor lightGrayColor]];
[self.view addSubview:showlab];
showlab.alpha=1.0;
//简单的动画效果
[UIView animateWithDuration:2.0 animations:^{
showlab.alpha=0;
} completion:^(BOOL finished) {
[showlab removeFromSuperview];
}];
}
@end
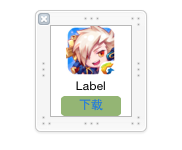
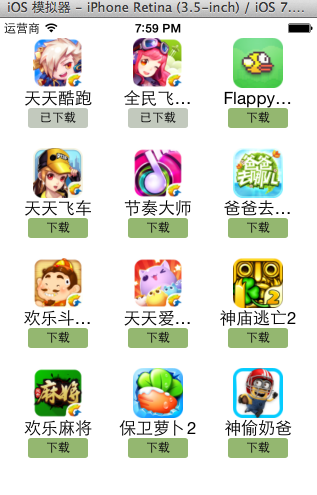
运行效果:
三、对xib进行连线示例
1.连线示例
新建一个xib对应的视图类,继承自Uiview

在xib界面右上角与新建的视图类进行关联

把xib和视图类进行连线

注意:在使用中把weak改成为强引用。否则...
2.连线后的代码示例
YYViewController.m文件代码如下:
复制代码 代码如下:
//
// YYViewController.m
// 10-xib文件的使用
//
// Created by apple on 14-5-24.
// Copyright (c) 2014年 itcase. All rights reserved.
//
#import "YYViewController.h"
#import "YYapp.h"
#import "YYappview.h"
@interface YYViewController ()
@property(nonatomic,strong)NSArray *app;
@end
复制代码 代码如下:
@implementation YYViewController
//1.加载数据信息
-(NSArray *)app
{
if (!_app) {
NSString *path=[[NSBundle mainBundle]pathForResource:@"app.plist" ofType:nil];
NSArray *temparray=[NSArray arrayWithContentsOfFile:path];
//字典转模型
NSMutableArray *arrayM=[NSMutableArray array ];
for (NSDictionary *dict in temparray) {
[arrayM addObject:[YYapp appWithDict:dict]];
}
_app=arrayM;
}
return _app;
}
//创建界面原型
- (void)viewDidLoad
{
[super viewDidLoad];
NSLog(@"%d",self.app.count);
//九宫格布局
int totalloc=3;
CGFloat appviewW=80;
CGFloat appviewH=90;
CGFloat margin=(self.view.frame.size.width-totalloc*appviewW)/(totalloc+1);
int count=self.app.count;
for (int i=0; i<count; i++) {
int row=i/totalloc;
int loc=i%totalloc;
CGFloat appviewX=margin + (margin +appviewW)*loc;
CGFloat appviewY=margin + (margin +appviewH)*row;
YYapp *app=self.app[i];
//拿出xib视图
NSArray *apparray= [[NSBundle mainBundle]loadNibNamed:@"appxib" owner:nil options:nil];
//注意这里的类型名!
//UIView *appview=[apparray firstObject];
YYappview *appview=[apparray firstObject];
//加载视图
appview.frame=CGRectMake(appviewX, appviewY, appviewW, appviewH);
[self.view addSubview:appview];
appview.appimg.image=app.image;
appview.applab.text=app.name;
appview.appbtn.tag=i;
[ appview.appbtn addTarget:self action:@selector(appviewbtnClick:) forControlEvents:UIControlEventTouchUpInside];
}
}
/**按钮的点击事件*/
-(void)appviewbtnClick:(UIButton *)btn
{
YYapp *apps=self.app[btn.tag];
UILabel *showlab=[[UILabel alloc]initWithFrame:CGRectMake(60, 450, 200, 20)];
[showlab setText:[NSString stringWithFormat: @"%@下载成功",apps.name]];
[showlab setBackgroundColor:[UIColor lightGrayColor]];
[self.view addSubview:showlab];
showlab.alpha=1.0;
//简单的动画效果
[UIView animateWithDuration:2.0 animations:^{
showlab.alpha=0;
} completion:^(BOOL finished) {
[showlab removeFromSuperview];
}];
}
@end
YYappview.h文件代码(已经连线)
复制代码 代码如下:
#import <UIKit/UIKit.h>
@interface YYappview : UIView
@property (strong, nonatomic) IBOutlet UIImageView *appimg;
@property (strong, nonatomic) IBOutlet UILabel *applab;
@property (strong, nonatomic) IBOutlet UIButton *appbtn;
@end
- 【iOS】iOS消息推送机制的实现
- [iOSUI进阶-3.2]手势识别器UIGestureRecogn
- 等待时动画效果的实现
- Objective-CCategories
- 版本更新关于NSUserDefault需注意的一点
- IOS多线程:NSOperationQueue
- OC-7.Foundation框架的简单介绍