
・您现在的位置: 云翼网络 >> 文章中心 >> 网站建设 >> 网站建设开发 >> ASP.NET网站开发 >> NHibernate3快速上手教程FluentNHibernate配置与DBHelper
- C#变量
- asp.net页面与页面之间传参数值
- 博客园实现方法的思考
- ASP.NET - 如何:以编程方式测试 ASP.NET 服务器控件的有效性
- 模块初始化实现地址的伪静态
- Excel上传并读取数据
- ADO.NET中的Connection详解
- 如何显示在线人数和所在位置
- net项目总结一(1)
- 博客园的第一天
- 同时对多个文件进行大量写操作对性能优化
- 20+个可重复使用的jQuery代码片段
- 用JavaScript调用WCF Service
- 读取Excel文件时出现null的解决方法
- 实现asp.net的文件压缩、解压、下载
- C#Windows服务安装
- IIS发布网站遇到的异常
- Lucene.net入门学习(结合盘古分词)
- Jquery asp.net注册表单实现校验生成与判断
- 度量Web性能的关键指标
- [WinForm]项目开发中Excel使用小计
- 解读ASP.NET 5 & MVC6系列(6):Middleware详解
- vs2008发布项目失败的解决方法
- 数据验证随想(续)
- C#中方法Show.和ShowDialog的使用区别
- 小组件---快递查询组件
- 三元表达式
- Super超级ERP系统---(10)订单打包
- Http方法:Get请求与Post请求的区别
- JS 代码管理折叠VS官方下载地址,类似.net 后台#region
NHibernate3快速上手教程FluentNHibernate配置与DBHelper
很多学习NHibernate的新手很容易卡在配置文件这一关,正所谓万事开头难,上手后再配合官方文档就比较容易了。
网上关于配置文件的资料非常多,但由于版本的问题,许多老的教程中都没有明确指出类库的版本号,
另外许多人抱怨配置比较麻烦,本教程结合FluentNHibernate简化配置,快速上手。
下载类库、版本要求:
NHibernate 3 及以上
Iesi.Collections 1.0.1.0
FluentNHibernate 1.4.0.0
.NET Framework 3及以上
NH3已经将日志与动态代理的类库集成了,所以只需要引入前两个配置文件。
总体思路:
1、通过配置文件hibernate.cfg.xml配置数据库连接;
2、配置文件注入到FluentNHibernate;
3、并添加实体模型的映射程序集到FluentNHibernate;
hibernate.cfg.xml:
数据库Oracle10g配置文件,看到那段被注释的英文了吗?
大致意思就是其他数据库可以参考NH包里面的数据库名称对应的配置文件,然后把文件名改成hibernate.cfg.xml,放在类库的根目录。
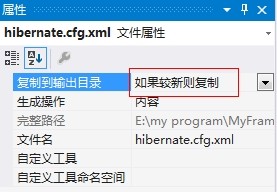
别忘了将配置文件复制到输出目录
<?xml version="1.0" encoding="utf-8"?>
<!--
This template was written to work with NHibernate.Test.
Copy the template to your NHibernate.Test PRoject folder and rename it in hibernate.cfg.xml and change it
for your own use before compile tests in VisualStudio.
-->
<!-- This is the System.Data.OracleClient.dll provider for Oracle from MS -->
<hibernate-configuration  xmlns="urn:nhibernate-configuration-2.2" >
    <session-factory name="MyManager">
        <property name="connection.driver_class">NHibernate.Driver.OracleClientDriver</property>
        <property name="connection.connection_string">
      User ID=user;PassWord=pwd;Data Source=oracle
    </property>
        <property name="show_sql">true</property>
    <property name="dialect">NHibernate.Dialect.Oracle10gDialect</property>
        <property name="query.substitutions">true 1, false 0, yes 'Y', no 'N'</property>
    </session-factory>

</hibernate-configuration>
顺手建立一个DBHelper类,或者叫SessionBuilder,直接复制一步到位。
    /*
     * by:13yan
     */
    public class SessionBuilder
    {
        private static ISessionFactory sessionFactory = null;
        private static object _lock = new object();

        #region 初始化 生成SessionFactory,并配置上下文策略
        public static void Instance(string currentSessionContextClass)
        {
            lock (_lock)
            {
                Configuration cfg = new Configuration()
                    .Configure()
                    .SetProperty("current_session_context_class", "web");
                sessionFactory= Fluently.Configure(cfg)
                    .Mappings(m =>
                        m.FluentMappings
                        .AddFromAssembly(typeof(SessionBuilder).Assembly))
                    .BuildSessionFactory();
            }
        }
        #endregion

        #region Session在当前上下文的操作
        private static void BindContext()
        {
            lock (_lock)
            {
                if (!CurrentSessionContext.HasBind(sessionFactory))
                {
                    CurrentSessionContext.Bind(sessionFactory.OpenSession());
                }
            }
        }

        private static void UnBindContext()
        {
            lock (_lock)
            {
                if (CurrentSessionContext.HasBind(sessionFactory))
                {
                    CurrentSessionContext.Unbind(sessionFactory);
                }
            }
        }

        public static void CloseCurrentSession()
        {
            UnBindContext();
        }

        public static ISession GetCurrentSession()
        {
            BindContext();
            return sessionFactory.GetCurrentSession();
        }
        #endregion

        #region 关闭SessionFactory(一般在应用程序结束时操作)
        public static void CloseSessionFactory()
        {
            if (!sessionFactory.IsClosed)
            {
                sessionFactory.Close();
            }
        }
        #endregion

        #region 打开一个新的Session
        public static ISession OpenSession()
        {
            lock (_lock)
            {
                return sessionFactory.OpenSession();
            }
        }
        #endregion

    }
使用这个类需要在应用程序启动时初始化,调用代码:SessionBuilder.Instance("web");,一般添加在Global.asax
    public class Global : System.Web.Httpapplication
    {

        void Application_Start(object sender, EventArgs e)
        {
            // 在应用程序启动时运行的代码
            SessionBuilder.Instance("web");
        }

    }
使用时可调用SessionBuilder.GetCurrentSession()获取上下文中的Session,以便实现自动打开关闭Session,
也可以SessionBuilder.OpenSession()得到一个普通的Session。
代码映射:
public class Department
{
        public virtual int ID { get; set; }
        public virtual string Name { get; set; }
}

public class DepartmentMap:ClassMap<Department>
{
        public DepartmentMap()
        {
            Table("SYSDEPT");
            Id(p => p.ID).GeneratedBy.Sequence("SEQ_SYSDEPT");
            Map(p => p.Name);
        }
 }
这个使用单实体的例子非常简单,相信差不多够上手了,
更加复杂的配置有一定的学习曲线,推荐边学边用,以前用低端一点的ORM不也单实体在用么,
NH的好处就在于简单起来可以很简单地用,完全上手后又拥有其他一般ORM无法满足的功能。
映射的重点:
实体类与数据库之间需要有一个映射,所以我们建立一个DepartmentMap映射类,它需要继承FluentNHibernate.Mapping.ClassMap<T>泛型类。
Table("SYSDEPT") 对应数据库表名;
Id映射主键,这里使用sequence,其他还有许多办法,比如GUID、自增长等。
Map映射,属性名与数据库字段相同就不需要另外声明了。
测试一下,看看我们是否成功了。
ISession session = SessionBuilder.GetCurrentSession();
session.BeginTransaction();
Department obj = session.Load<Department>(102);
obj.Name = "新部门";
session.SaveOrUpdate(obj);
session.Transaction.Commit();
如果到这里已经能够获取到session了,那么恭喜你成功了,现在我们已经可以边看官方文档边实战了。
如果你看不懂这段代码,没关系,可以边看官方文档边练习了。
- 上一篇文章: .NET我的第一个WCF架构学习
- 下一篇文章: 验证码