
- Android的ListView多选删除操作实现代码
- android Tween Animation属性设置方法实例
- 基于Android XML解析与保存的实现
- Android 实现全屏和无标题栏的显示
- Android应用中炫酷的横向和环形进度条的实例分享
- Android相机、图册demo
- 腾讯微博Android客户端开发.6.换取Access.Token
- android md5加密与rsa加解密实现代码
- Android开发自学笔记(四):APP布局下
- Android实现Toast提示框图文并存的方法
- Android客户端软件开发_7、Android软件开发的思考
- Android 开发系统自带语音模块应用
- Android设置TextView显示指定个数字符,超过部分显示...(省略号)的方法
- Android App中的GridView网格布局使用指南
- Android中使用ViewFlipper进行手势切换实例
- Android重要控件SnackBar使用方法详解
- Android中HttpURLConnection与HttpClient的使用与封装
- Adapter模式实战之重构鸿洋集团的Android圆形菜单建行
- Android中Service(后台服务)详解
- Android实现两个ScrollView互相联动的同步滚动效果代码
- Android AlertDialog对话框用法示例
- android 多线程技术应用
- cocos2d-2.0-x-2.0.3 交叉编译到android报错解决
- Android中TimePicker与DatePicker时间日期选择组件的使用实例
- Android开发之资源目录assets与res/raw的区别分析
- Android查看电池电量的方法(基于BroadcastReceiver)
- Android Studio使用教程(四):Gradle基础
- 将替代ListView的RecyclerView 的使用详解(一)
- Android 按后退键退出Android程序的实现方法
- Android xml实现animation的4种动画效果实例代码
另外两种Android沉浸式状态栏实现思路
关于沉浸式状态栏相信大家都不陌生,IOS系统很早就有,android5.0及以后版本都支持给状态栏着色,而目前android主流版本还是4.4,网上通用实现4.4(API19)沉浸式状态栏也都是依赖于可以将状态栏变为透明的属性,再为其着色,主要实现代码:
@Override
 protected void onCreate(Bundle savedInstanceState) {
  super.onCreate(savedInstanceState);
  setContentView(R.layout.activity_match_actionbar);
    //只对api19以上版本有效
  if (Build.VERSION.SDK_INT >= Build.VERSION_CODES.KITKAT) {
   setTranslucentStatus(true);
  }
    //为状态栏着色
  SystemBarTintManager tintManager = new SystemBarTintManager(this);
  tintManager.setStatusBarTintEnabled(true);
  tintManager.setStatusBarTintResource(R.color.statusbar_bg);

 }

 @TargetApi(19)
 private void setTranslucentStatus(boolean on) {
  Window win = getWindow();
  WindowManager.LayoutParams winParams = win.getAttributes();
  final int bits = WindowManager.LayoutParams.FLAG_TRANSLUCENT_STATUS;
  if (on) {
   winParams.flags |= bits;
  } else {
   winParams.flags &= ~bits;
  }
  win.setAttributes(winParams);
 }
再在根布局添加以下两个属性:
 android:fitsSystemWindows="true"
 android:clipToPadding="false"
这样就可以了,以上着色使用了SystemBarTint。
为什么我要寻找其他的方案?
面对大多数的界面自然是没有多大问题,但是针对类似QQ这种侧滑的界面,如图:
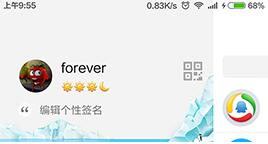
我的手机系统版本是4.4的,如果想做成QQ侧滑背景这样的效果,使用上面的方案就变成了这样

这样出来的效果就会很丑,于是才有了改进版的方案,不知QQ是否是这样做的。
除了上述的缺陷以外,还有一点看着不是很舒服,就是当我使用抽屉菜单或者滑动返回效果的时候是这样的

状态栏并没有阴影效果
我想要的效果是这样的

状态栏也会跟着一起滑动
第一种思路
自定义一个状态栏,不能添加“ android:fitsSystemWindows="true"
”这个属性,不然无法填充到状态栏,如下
<?xml version="1.0" encoding="utf-8"?>
<LinearLayout xmlns:android="http://schemas.android.com/apk/res/android"
    android:layout_width="match_parent"
    android:layout_height="match_parent"
    android:background="@color/colorAccent"
    android:orientation="vertical">

 <View
  android:id="@+id/status_bar"
  android:layout_width="match_parent"
  android:layout_height="20dp"/>

 <FrameLayout
  android:layout_width="match_parent"
  android:layout_height="match_parent"/>

</LinearLayout>
在到代码中判断
 @Override
 protected void onCreate(Bundle savedInstanceState) {
  super.onCreate(savedInstanceState);
  View statusBar = findViewById(R.id.status_bar);

  setContentView(R.layout.activity_test);
  //判断SDK版本是否大于等于19,大于就让他显示,小于就要隐藏,不然低版本会多出来一个
  if (Build.VERSION.SDK_INT >= Build.VERSION_CODES.KITKAT) {
   setTranslucentStatus(true);
   statusBar.setVisibility(View.VISIBLE);
   //还有设置View的高度,因为每个型号的手机状态栏高度都不相同
  }else{
   statusBar.setVisibility(View.GONE);
  }
 }
 @TargetApi(19)
 private void setTranslucentStatus(boolean on) {
  Window win = getWindow();
  WindowManager.LayoutParams winParams = win.getAttributes();
  final int bits = WindowManager.LayoutParams.FLAG_TRANSLUCENT_STATUS;
  if (on) {
   winParams.flags |= bits;
  } else {
   winParams.flags &= ~bits;
  }
  win.setAttributes(winParams);
 }
其实,这样已经解决了我上面提出的两个问题
第二种实现方案
第二种方案是为了解决第一种方案中遇到的奇葩问题,设置了透明属性的界面(聊天及底下评论的框框)不能被系统输入法顶上去,之前写过一篇Android 聊天界面背景图片被输入法“顶上去”问题解析,现在遇到的就是无论如何聊天的输入框都不能被系统输入法顶上去(就是打字看不到输入框),经过一番测试,发现竟然和“ android:fitsSystemWindows="true"
”这个属性有关,加上去输入框就没问题,但自定义的状态栏不能被填充到真正的状态栏位置
陷入了两难的境地,加还是不加都有问题,而且都特别明显,说了半天,来看看第二种方案。
<?xml version="1.0" encoding="utf-8"?>
<RelativeLayout
 xmlns:android="http://schemas.android.com/apk/res/android"
 xmlns:tools="http://schemas.android.com/tools"
 android:layout_width="match_parent"
 android:layout_height="match_parent"
 android:background="@android:color/holo_green_light"
 android:fitsSystemWindows="true"
 tools:context="com.saidtx.myapplication.TestActivity">

 <ScrollView
  android:layout_width="match_parent"
  android:layout_height="match_parent"
  android:layout_above="@+id/edit"
  android:background="@android:color/white">

  <LinearLayout
   android:layout_width="match_parent"
   android:layout_height="wrap_content">

   <TextView
    android:layout_width="match_parent"
    android:layout_height="wrap_content"
    android:gravity="center"
    android:padding="20dp"
    android:text="@string/previews"/>
  </LinearLayout>
 </ScrollView>

 <LinearLayout
  android:id="@+id/edit"
  android:layout_width="match_parent"
  android:layout_height="wrap_content"
  android:layout_alignParentBottom="true"
  android:background="@android:color/white">

  <EditText
   android:layout_width="match_parent"
   android:layout_height="wrap_content"/>
 </LinearLayout>

</RelativeLayout>
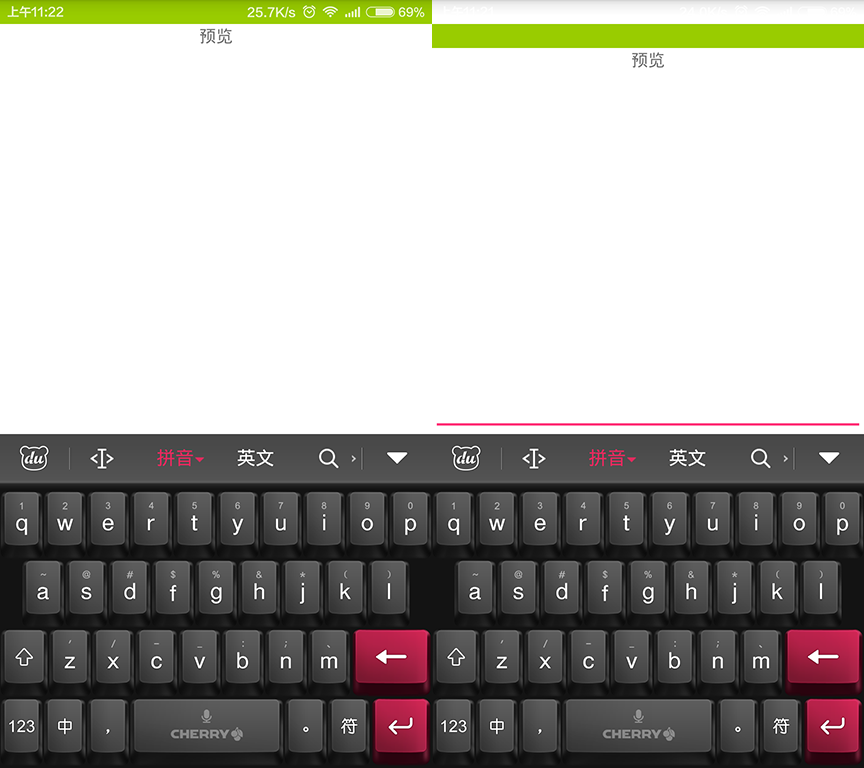
关键在于下面两个属性,还有需要在其他子布局添加背景,不然就跟随了最外层的背景,代码部分还是采用网上通用方案,只是不需要自定义的状态栏了,也不需要计算状态栏的高度
android:fitsSystemWindows="true"
android:background="@android:color/holo_green_light"
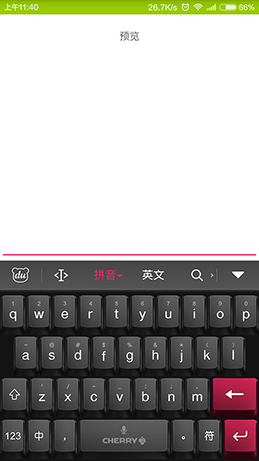
最终效果
以上就是本文的全部内容,希望对大家的学习Android软件编程有所帮助。
- 上一篇文章: Android自定义ProgressDialog进度等待框
- 下一篇文章: Android实现波浪线效果(xml bitmap)
- Android控件之Gallery用法实例分析
- Android(2.2/2.3系统)Gallery解决默认和横
- Android入门之RelativeLayout、FrameLayout
- Android中判断是否联网实现代码
- RecyclerView的万能分割线
- Android编程之杀毒的实现原理及具体实例
- Android实现上传文件功能的方法