
- Android中检查、设置默认程序详解
- Android组件TabHost实现页面中多个选项卡切换效果
- android ListView内数据的动态添加与删除实例代码
- Android实现截屏并保存操作功能
- Android UI设计系列之自定义ListView仿QQ空间阻尼下拉刷新和渐变菜单栏效果(8)
- Android应用中使用DOM方式解析XML格式数据的基本方法
- Android新功能曝光 或为5.1版且明年2月发
- Android clipChildren属性实例详解
- 安卓Android Context类实例详解
- 图解Eclipse在线安装ADT插件过程
- 另外两种Android沉浸式状态栏实现思路
- Android系统开发中log的使用方法及简单的原理
- Android基于Pull方式解析xml的方法详解
- 深入浅析Android手机卫士保存密码时进行md5加密
- Android执行shell命令详解
- APK程序获取system权限的方法
- Android实现button居中的方法
- Android控件系列之Shape使用方法
- 使用PHP开发Android应用程序技术介绍
- Android 将 android view 的位置设为右下角的解决方法
- android开发教程之间隔执行程序(android计时器)
- Android开发笔记之:ListView刷新顺序的问题详解
- android中开启actionbar的两种方法
- Android编程开发中ListView的常见用法分析
- 基于android样式与主题(style&theme)的详解
- 获取Android系统唯一识别码的方法
- Android应用程序的编译流程及使用Ant编译项目的攻略
- 导致adb无法启动的5种情况和解决方法
- 学习Android自定义Spinner适配器
- Android开发中Intent传递对象的方法分析
Android编程使用Fragment界面向下跳转并一级级返回的实现方法
本文实例讲述了Android编程使用Fragment界面向下跳转并一级级返回的实现方法。分享给大家供大家参考,具体如下:
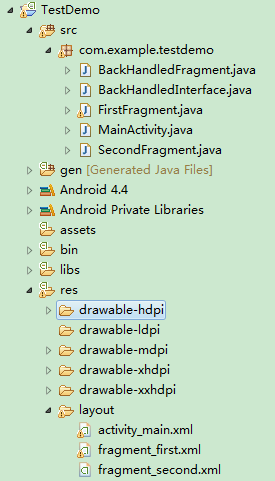
1.首先贴上项目结构图:
2.先添加一个接口文件BackHandledInterface.java,定义一个setSelectedFragment方法用于设置当前加载的Fragment在栈顶,主界面MainActivity须实现此接口,代码如下:
package com.example.testdemo;
public interface BackHandledInterface {
  public abstract void setSelectedFragment(BackHandledFragment selectedFragment);
}
3.定义一个抽象类BackHandledFragment继承自Fragment,后面跳转的Fragment界面都要继承自BackHandledFragment。抽象类BackHandledFragment中定义一个返回值为boolean类型的onBackPressed方法,用于处理点击返回按键(物理Back键)时的逻辑,若该方法返回false,表示当前Fragment不消费返回事件,而由Fragment所属的FragmentActivity来处理这个事件。代码如下:
package com.example.testdemo;
import android.os.Bundle;
import android.support.v4.app.Fragment;
public abstract class BackHandledFragment extends Fragment {
  protected BackHandledInterface mBackHandledInterface;
  /**
   * 所有继承BackHandledFragment的子类都将在这个方法中实现物理Back键按下后的逻辑
   */
  protected abstract boolean onBackPressed();
  @Override
  public void onCreate(Bundle savedInstanceState) {
    super.onCreate(savedInstanceState);
    if (!(getActivity() instanceof BackHandledInterface)) {
      throw new ClassCastException(
          "Hosting Activity must implement BackHandledInterface");
    } else {
      this.mBackHandledInterface = (BackHandledInterface) getActivity();
    }
  }
  @Override
  public void onStart() {
    super.onStart();
    // 告诉FragmentActivity,当前Fragment在栈顶
    mBackHandledInterface.setSelectedFragment(this);
  }
}
4.主界面MainActivity要继承FragmentActivity才能调用getSupportFragmentManager()方法来处理Fragment。MainActivity还需重写onBackPressed方法用来捕捉返回键(Back Key)事件,代码如下:
package com.example.testdemo;
import android.os.Bundle;
import android.support.v4.app.FragmentActivity;
import android.support.v4.app.FragmentManager;
import android.support.v4.app.FragmentTransaction;
import android.view.View;
import android.view.View.OnClickListener;
import android.widget.Button;
public class MainActivity extends FragmentActivity implements
    BackHandledInterface {
  private static MainActivity mInstance;
  private BackHandledFragment mBackHandedFragment;
  private Button btnSecond;
  @Override
  public void onCreate(Bundle savedInstanceState) {
    super.onCreate(savedInstanceState);
    setContentView(R.layout.activity_main);
    btnSecond = (Button) findViewById(R.id.btnSecond);
    btnSecond.setOnClickListener(new OnClickListener() {
      @Override
      public void onClick(View v) {
        FirstFragment first = new FirstFragment();
        loadFragment(first);
        btnSecond.setVisibility(View.GONE);
      }
    });
  }
  public static MainActivity getInstance() {
    if (mInstance == null) {
      mInstance = new MainActivity();
    }
    return mInstance;
  }
  public void loadFragment(BackHandledFragment fragment) {
    BackHandledFragment second = fragment;
    FragmentManager fm = getSupportFragmentManager();
    FragmentTransaction ft = fm.beginTransaction();
    ft.replace(R.id.firstFragment, second, "other");
    ft.addToBackStack("tag");
    ft.commit();
  }
  @Override
  public void setSelectedFragment(BackHandledFragment selectedFragment) {
    this.mBackHandedFragment = selectedFragment;
  }
  @Override
  public void onBackPressed() {
    if (mBackHandedFragment == null || !mBackHandedFragment.onBackPressed()) {
      if (getSupportFragmentManager().getBackStackEntryCount() == 0) {
        super.onBackPressed();
      } else {
        if (getSupportFragmentManager().getBackStackEntryCount() == 1) {
          btnSecond.setVisibility(View.VISIBLE);
        }
        getSupportFragmentManager().popBackStack();
      }
    }
  }
}
5.分别添加两个子级Fragment,FirstFragment.java和SecondFragment.java,代码分别如下:
FirstFragment.java:
package com.example.testdemo;
import android.os.Bundle;
import android.support.annotation.Nullable;
import android.support.v4.app.FragmentManager;
import android.support.v4.app.FragmentTransaction;
import android.view.LayoutInflater;
import android.view.View;
import android.view.View.OnClickListener;
import android.view.ViewGroup;
import android.widget.Button;
public class FirstFragment extends BackHandledFragment {
  private View myView;
  private Button btnSecond;
  @Override
  public View onCreateView(LayoutInflater inflater,
      @Nullable ViewGroup container, @Nullable Bundle savedInstanceState) {
    myView = inflater.inflate(R.layout.fragment_first, null);
    initView();
    return myView;
  }
  private void initView() {
    btnSecond = (Button) myView.findViewById(R.id.btnSecond);
    btnSecond.setOnClickListener(new OnClickListener() {
      @Override
      public void onClick(View v) {
        SecondFragment second = new SecondFragment();
        FragmentManager fm = getFragmentManager();
        FragmentTransaction ft = fm.beginTransaction();
        ft.replace(R.id.firstFragment, second);
        ft.addToBackStack("tag");
        ft.commit();
      }
    });
  }
  @Override
  protected boolean onBackPressed() {
    return false;
  }
}
SecondFragment.java:
package com.example.testdemo;
import android.os.Bundle;
import android.support.annotation.Nullable;
import android.view.LayoutInflater;
import android.view.View;
import android.view.ViewGroup;
public class SecondFragment extends BackHandledFragment {
  private View mView;
  @Override
  public View onCreateView(LayoutInflater inflater,
      @Nullable ViewGroup container, @Nullable Bundle savedInstanceState) {
    mView = inflater.inflate(R.layout.fragment_second, null);
    return mView;
  }
  @Override
  protected boolean onBackPressed() {
    return false;
  }
}
6.三个布局文件代码如下:
activity_main.xml:
<RelativeLayout xmlns:android="http://schemas.android.com/apk/res/android"
  xmlns:tools="http://schemas.android.com/tools"
  android:layout_width="match_parent"
  android:layout_height="match_parent"
  android:orientation="vertical" >
  <TextView
    android:layout_width="wrap_content"
    android:layout_height="wrap_content"
    android:layout_centerInParent="true"
    android:text="FragmentActivity 父界面"
    android:textSize="26sp" />
  <Button
    android:id="@+id/btnSecond"
    android:layout_width="wrap_content"
    android:layout_height="wrap_content"
    android:layout_alignParentBottom="true"
    android:text="跳转到FirstFragment" />
  <FrameLayout
    android:id="@+id/firstFragment"
    android:layout_width="match_parent"
    android:layout_height="match_parent" >
  </FrameLayout>
</RelativeLayout>
fragment_first.xml:
<?xml version="1.0" encoding="utf-8"?>
<RelativeLayout xmlns:android="http://schemas.android.com/apk/res/android"
  android:layout_width="match_parent"
  android:layout_height="match_parent"
  android:background="#e5e5e5"
  android:orientation="vertical" >
  <TextView
    android:layout_width="wrap_content"
    android:layout_height="wrap_content"
    android:layout_centerInParent="true"
    android:text="FirstFragment"
    android:textColor="#000000"
    android:textSize="26sp" />
  <Button
    android:id="@+id/btnSecond"
    android:layout_width="wrap_content"
    android:layout_height="wrap_content"
    android:layout_alignParentBottom="true"
    android:text="打开SecondFragment" />
</RelativeLayout>
fragment_second.xml:
<?xml version="1.0" encoding="utf-8"?>
<RelativeLayout xmlns:android="http://schemas.android.com/apk/res/android"
  android:layout_width="match_parent"
  android:layout_height="match_parent"
  android:background="#e5e5e5"
  android:orientation="vertical" >
  <TextView
    android:layout_width="wrap_content"
    android:layout_height="wrap_content"
    android:layout_centerInParent="true"
    android:text="SecondFragment"
    android:textColor="#000000"
    android:textSize="26sp" />
</RelativeLayout>
7.最后奉上实例链接:
完整实例代码代码点击此处本站下载。
希望本文所述对大家Android程序设计有所帮助。
- 上一篇文章: Android编程单击图片实现切换效果的方法
- 下一篇文章: Android应用开发之简易、大气音乐播放器实现专辑倒影效果
- Android实现ListView分页自动加载数据的方法
- Android根据电话号码获得联系人头像实例代码
- Android获取屏幕方向及键盘状态的小例子
- vbs打开ie两种方法 在VBScript中启动IE浏览
- Android中监听软键盘显示状态实现代码
- ubuntu 12.10 上 android 编译环境搭建的深
- Android实现Activity之间通信的方法