
- Android开发笔记之:Log图文详解(Log.v,Log.d,Log.i,Log.w,Log.e)
- Android自定义ProgressDialog进度等待框
- Android使用音频信息绘制动态波纹
- android 为应用程序创建桌面快捷方式技巧分享
- Android编程单元测试实例详解(附源码)
- Android开发之WebView输入框提示解决办法
- Android中自定义标题栏样式的两种方法
- 使用DrawerLayout组件实现侧滑抽屉的功能
- 六款值得推荐的android(安卓)开源框架简介
- Android中的Shape和Selector的结合使用实例
- Android中使用OkHttp包处理HTTP的get和post请求的方法
- Android Dialog 对话框详解及示例代码
- Android Socket通信详解
- 解析后台进程对Android性能影响的详解
- android基础教程之夜间模式实现示例
- Android布局控件之常用linearlayout布局
- Android应用程序四大组件之使用AIDL如何实现跨进程调用Service
- Android模仿知乎的回答详情页的动画效果
- Android设置全屏代码分享
- android 动态控制状态栏显示和隐藏的方法实例
- 分享几个Android开发有用的程序代码
- Android中实时获取音量分贝值详解
- android获取手机IMSI码判断手机运营商代码实例
- Android ListView获得选项中的值
- Android使用Messenger实现service与activity交互
- Android WebView无法弹出软键盘的原因及解决办法
- Android中代码运行指定Apk的简单方法
- 移动端WebApp隐藏地址栏的方法
- android读写sd卡操作写入数据读取数据示例
- Android客户端软件开发_15、下载模块界面分析和实现
Android学习笔记之应用单元测试实例分析
作者:佚名 Android开发编辑:admin 更新时间:2022-07-23
本文实例讲述了Android学习笔记之应用单元测试。分享给大家供大家参考,具体如下:
第一步:在AndroidManifest.xml中加入如下两段代码:
<manifest xmlns:android="http://schemas.android.com/apk/res/android"
package="com.pccw"
android:versionCode="1"
android:versionName="1.0">
<uses-sdk android:minSdkVersion="8" />
<application android:icon="@drawable/icon" android:label="@string/app_name">
<activity android:name=".MainActivity"
android:label="@string/app_name">
<intent-filter>
<action android:name="android.intent.action.MAIN" />
<category android:name="android.intent.category.LAUNCHER" />
</intent-filter>
</activity>
<!―添加代码1-->
<uses-library android:name="android.test.runner"/>
</application>
<!―添加代码2-->
<instrumentation android:name="android.test.InstrumentationTestRunner"
android:targetPackage="com.pccw" android:label="aaa"/>
</manifest>
1. <uses-library android:name="android.test.runner"/>代表把单元测试框架中的一些依赖库引入进来
2. <instrumentation android:name="android.test.InstrumentationTestRunner"android:targetPackage="com.pccw" android:label="aaa"/>代表配置单元测试框架的启动装置,启动装置有好几个类,可以选择,一般情况下我们使用上面这个。
3. targetPackage与上面的package相同,代表单元测试框架和当前应用是处于同一个进程中
第二步:编写业务逻辑,即需要被测试的模块
public class PersonService {
 public void save(String name){
  String sub = name.substring(6);
 }
 public int add(int a, int b){
  return a+b;
 }
}
第三步:编写单元测试代码
public class PersonServiceTest extends AndroidTestCase {
 public void testSave() throws Exception {
  PersonService service = new PersonService();
  service.save(null);
 }
 public void testAdd() throws Exception {
  PersonService service = new PersonService();
  int result = service.add(1, 2);
  Assert.assertEquals(3, result);
 }
}
第四步:打开eclipse中的outline窗口,其中会显示单元测试类的所有的方法
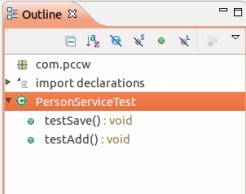
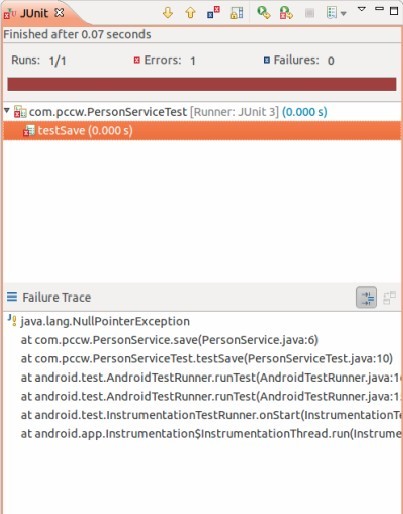
然后想要测试哪个方法,则在哪个测试方法上右键鼠标,选择Run As,然后再选择Android JUnit Test即可,如果有异常或者错误,则会出现如下情况:
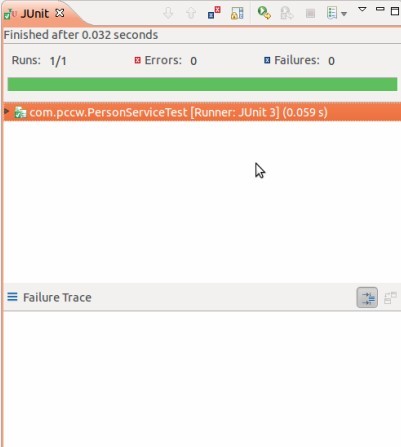
如果是正常的,则会如下:
希望本文所述对大家Android程序设计有所帮助。
- 上一篇文章: Android编程之单元测试实例分析
- 下一篇文章: Android编程实现给Button添加图片和文字的方法
- [Android开发从零开始].20.广播事件处理(1)
- 实例解析Android系统中的ContentProvider组
- Android基于google Zxing实现各类二维码扫描
- Android的单位以及屏幕分辨率详解
- Android App调用MediaRecorder实现录音功能
- android RadioGroup的使用方法
- Android开发入门之Service用法分析